Dev Container Setup for Hugo
Table of Contents
Some weeks ago, I spoked about the benefits of using Dev Containers in Open Source projects.
In the article, I also provided a definition of a Dev Container and described the benefits of using them. You can find it here.
Today I would like to do something more practical and share with you a minimum configuration to setup Dev Containers for your Hugo website.
Prerequisites #
Whether you are a macOS user or a Windows user, you need to have the following installed:
- Visual Studio Code
- VS Code Dev Containers extension
- Docker Desktop
I have prepared this guide as a macOS user, so I have not tried to run Dev Containers on Windows or Linux. If you are a Windows or Linux user, please refer to the Visual Studio Code documentation for installation instructions.
If you have installed the tools above, you are ready to define and create a Dev Container to develop your Hugo website.
Dev Container Setup #
In the bottom left of your VS Code window, you should see a button like the one below:
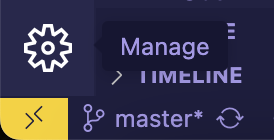
Click on it, and a setup wizard will pop up in the middle of the window.
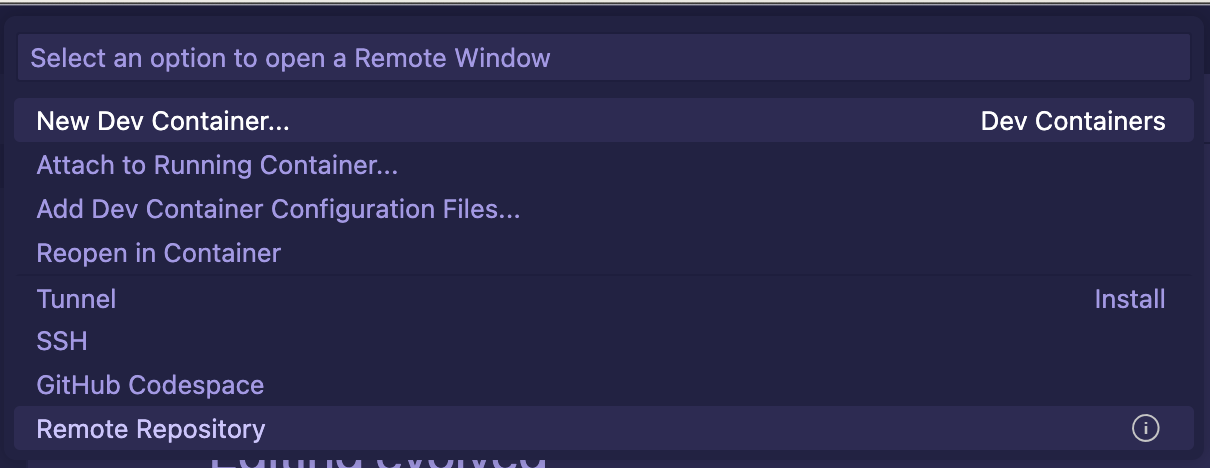
The first step is to select the template you would like to use.
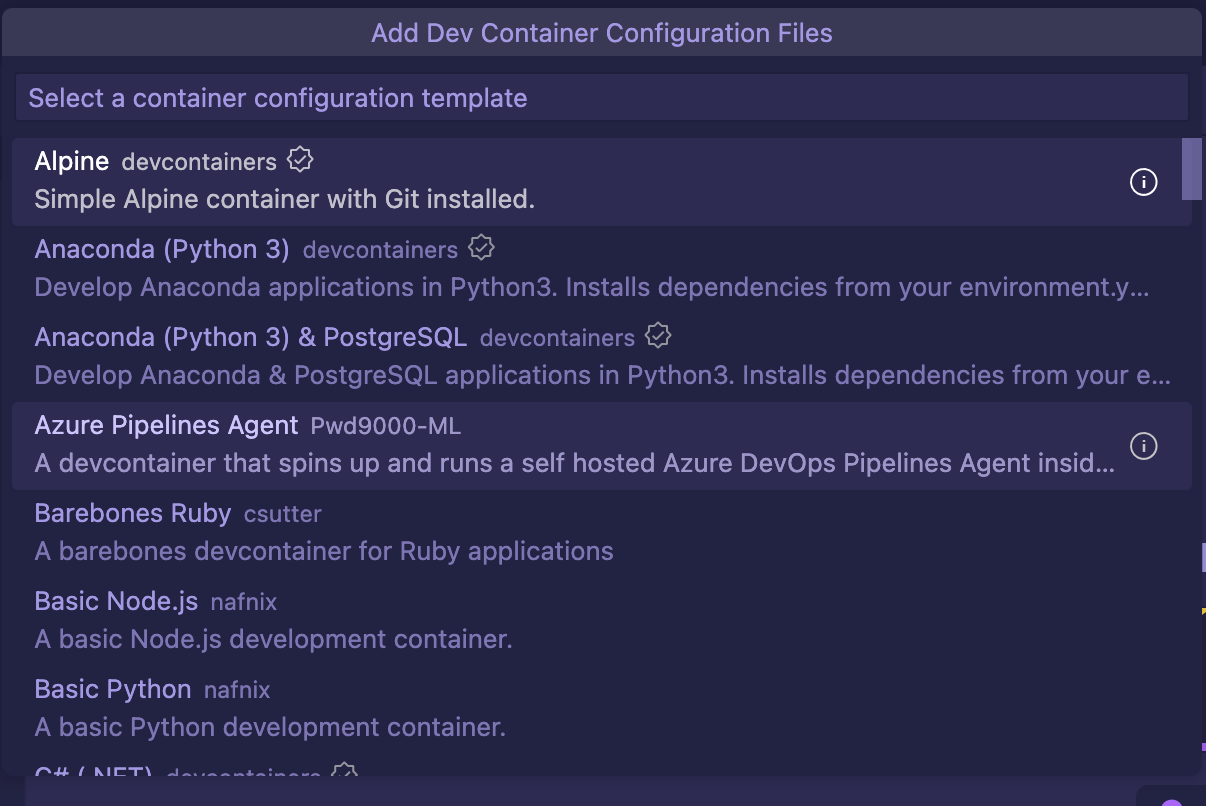
For our case, we know that Hugo feature works on Debian or Linux distributions with the apt package manager installed. So, select Debian.
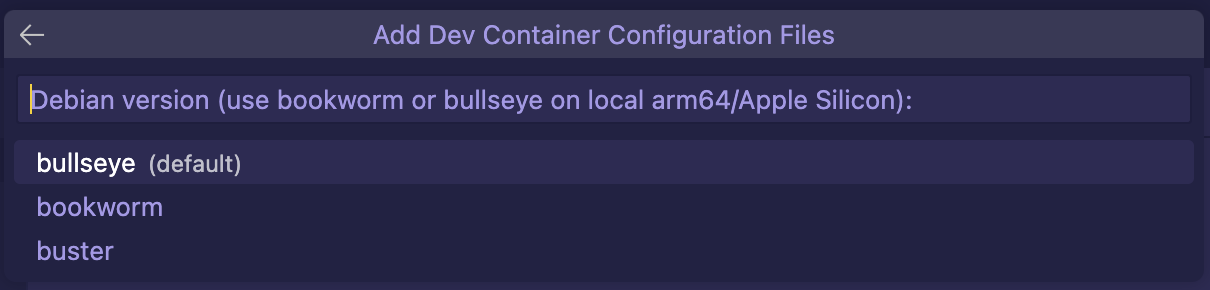
At this point, you will have to set the version of the Debian distirbution. My mac has new-generation cpu (Apple silicon), so I had to select bullseye.
Finally, let’s add the features needed.
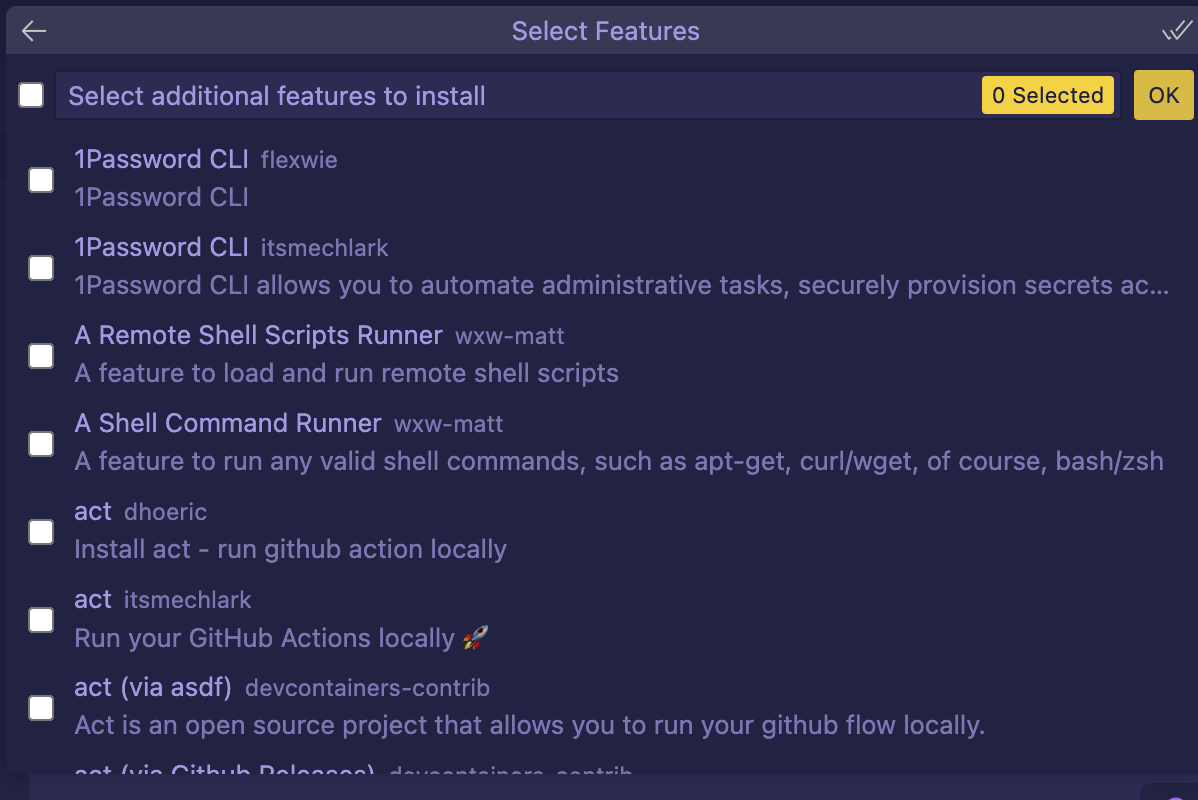
To build your website with Hugo, you need, in most cases, Git and Go. Check the prerequisites needed here.
Let’s add Hugo, Git and Go features.
Click OK.
Visual Studio Code creates the devcontainer.json file and adds it to the .devcontainerin the root directory.
This is how the devcontainer.json file looks like:
{
	"name": "Debian",
	"image": "mcr.microsoft.com/devcontainers/base:bullseye",
	"features": {
		"ghcr.io/devcontainers/features/git:1": {},
		"ghcr.io/devcontainers/features/go:1": {},
		"ghcr.io/devcontainers/features/hugo:1": {}
	}
}
We are ready to run the container.
Let’s click on the button at the bottom of the VS Code sidebar. We will see the wizard popping up again.
Select Reopen in Container option.
Visual Studio Code will reopen the project in a new window, even though it looks the same. You can notice that a label appeared next to
the Dev Container extension icon.
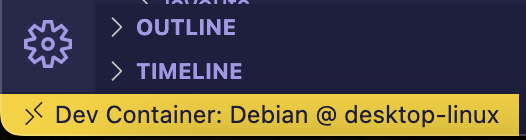
The container is up and running so now we can start to develop our Hugo Website.
Create Hugo website #
First of all, we have to create a new site. In the root folder then run:
hugo new site . --force
In the project I have created, I have installed Hugo Winston theme. Let’s see how.
In the root folder run:
git clone https://github.com/zerostaticthemes/hugo-winston-theme.git themes/hugo-winston-theme
As a last step, let’s copy the example content located in mynewsite/themes/hugo-winston-theme/exampleSite/.
cp -a themes/hugo-winston-theme/exampleSite/. .
We are now ready to build and serve our new site. Let’s run:
hugo server
Usually, Hugo Server is available at http://localhost:1313/. If you reach localhost, you could see we got a 404. This is due to the fact we have installed Hugo, but in the Hugo Wiston theme installation guide, it is said to have hugo extended version.
Let’s fix this.
In Readme file of
Hugo features, you can see that among the available options there is extended, which is a boolean. Let’s add that to the devcontainer.json. It should look like this:
{
	"name": "Debian",
	"image": "mcr.microsoft.com/devcontainers/base:bullseye",
	"features": {
		"ghcr.io/devcontainers/features/git:1": {},
		"ghcr.io/devcontainers/features/go:1": {},
		"ghcr.io/devcontainers/features/hugo:1": {
			"extended": true
		}
	}
}
Since we have changed the Dev Container specification, VS Code will notify us to rebuild the container in order to see the changes, using a
popup like this one:

Let’s click on Rebuild button.
We need to build and serve the site again.
hugo server
Now at localhost, your website should be available and working as expected.
If we want to automate the building and the serving actions, we can add a postStartCommand property, with hugo server set, to the devcontainer.json file.
{
	"name": "Debian",
	"image": "mcr.microsoft.com/devcontainers/base:bullseye",
	"features": {
		"ghcr.io/devcontainers/features/git:1": {},
		"ghcr.io/devcontainers/features/go:1": {},
		"ghcr.io/devcontainers/features/hugo:1": {
			"extended": true
		}
	},
	"postStartCommand": "hugo server"
}
In this way, the next time you start the container again, the hugo server command will be run automatically.
Wrap up #
That’s all, folks! 🚀
We have seen how to create a minimum configuration to set up Dev Containers for your Hugo website. I have created a project on GitHub that you could fork and start to develop your hugo website using Dev Containers.
You can find it here. Enjoy it!